
Windows Setup#
All contributor installation steps can be completed without administration access. To achieve this choose “Install for my user only” when prompted.
Overview#
Install Python (3.7, 3.8 or 3.9)
Clone the PyMedPhys git repo
eg.
git clone https://github.com/pymedphys/pymedphys.git
Run
poetry install -E allwithin the root of the repoRun
poetry run pre-commit install
You’re good to go.
More Advanced Options#
Opinionated Recommendations#
Install VSCode as your code editor
Install Jupyter Lab to work with Notebooks
More details#
Install contributor system dependencies#
Python#
Download and install Python 3 for Windows, preferably from the official distribution.
Warning
At present, although PyMedPhys works with Python 3.10, not all of its dependencies do. For now, we recommend installing Python 3.7, 3.8 or 3.9.
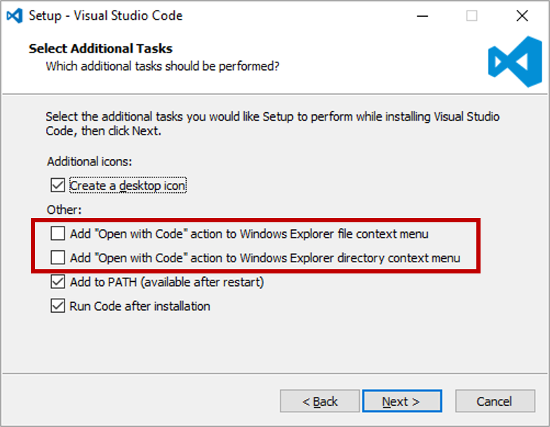
VSCode#
Download and install VSCode. Make sure to tick the “Open with Code” boxes:
Git and pandoc#
Use the following links to install git and pandoc.
If you don’t have admin access make sure to install within your user account.
When installing git it will ask you what default text editor to use. If you
don’t know what vim is make sure to change the default setting from vim
to VSCode (that was just installed).
Install poetry#
To install Poetry run the following within a command prompt:
curl -sSL https://raw.githubusercontent.com/sdispater/poetry/master/get-poetry.py | python
What this does is detailed in the Install Poetry docs. You will need to close and reopen your command prompt after installing Poetry.
Install the development version of PyMedPhys and pre-commit#
To download a copy of the PyMedPhys repository onto your machine run:
git clone https://github.com/pymedphys/pymedphys.git
Then change into the newly created directory by running:
cd pymedphys
Then install PyMedPhys and set up pre-commit by running:
poetry install -E all
poetry run pre-commit install
Install a Jupyter Lab kernel for the development install#
poetry run python -m ipykernel install --user --name pymedphys